
Introduction
There’s something deeply satisfying about a snack that’s both wholesome and indulgent. For me, Nut Energy Balls became a kitchen staple during a busy stretch of working long hours while trying to stay healthy. I needed something easy to grab, naturally sweet, and full of energy without reaching for processed snacks. That’s when I started experimenting with different combinations of nuts, dried fruits, seeds, and natural binders until I found a formula that was easy to prepare, endlessly versatile, and delicious every time.
Nut Energy Balls have grown from a niche health food into a global favorite, thanks to their no-bake simplicity, portability, and nourishing ingredients. Whether you’re a gym-goer, a parent packing lunchboxes, or someone trying to beat the afternoon slump at work, these energy balls offer a solution that tastes like a treat but fuels like a superfood.
What makes Nut Energy Balls special is how customizable they are. With just a few pantry staples—like almonds, dates, oats, and nut butter you can create a balanced snack loaded with protein, healthy fats, and fiber. Add-ins like cocoa powder, coconut flakes, or chia seeds make each batch unique, so you never get bored.
This article will walk you through everything you need to know to make perfect Nut Energy Balls every time from choosing the best nuts to troubleshooting texture problems and storing them the right way.
Key Benefits
Nut Energy Balls are more than just convenient; they deliver a wide range of health benefits:
First, they’re nutrient-dense. Each bite packs protein from nuts and seeds, natural sugars from dried fruits, and healthy fats that keep you full longer. This makes them ideal as a pre-workout snack or a mid-day energy boost without the crash you’d get from refined sugars.
Second, they’re incredibly easy to make. You don’t need an oven or advanced equipment—just a food processor and a few minutes of hands-on time. It’s a one-bowl recipe with minimal cleanup.
Third, they’re customizable for any diet. Whether you’re vegan, gluten-free, paleo, or just avoiding refined sugar, Nut Energy Balls can be adapted to your needs. You control the ingredients, so there are no hidden additives.
Lastly, they’re budget-friendly. Instead of spending money on pre-packaged health bars, you can make a week’s worth of snacks at home using bulk ingredients.
Recipe Card / Summary Box
Prep Time: PT15M
Cook Time: PT0M (No cooking required)
Total Time: PT15M
Servings: 18–20 balls
Difficulty: Easy
Estimated Cost: $5–$8
Ingredient List
For the Base
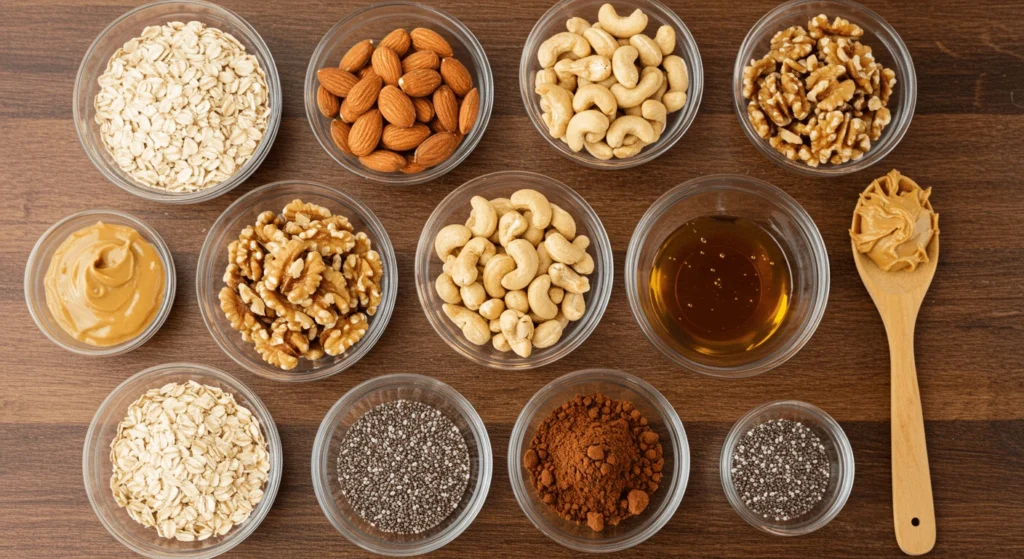
- 1 cup raw almonds
- 1 cup pitted Medjool dates
- ½ cup rolled oats (gluten-free if needed)
- 3 tablespoons natural peanut butter (or almond butter)
- 1 tablespoon honey or maple syrup
- 1 tablespoon chia seeds
- 1 teaspoon vanilla extract
- Pinch of salt
Optional Add-ins (choose up to two)
- 2 tablespoons cocoa powder (for a chocolate version)
- ¼ cup unsweetened shredded coconut
- 2 tablespoons mini dark chocolate chips
- 1 tablespoon flaxseed meal
- ¼ teaspoon cinnamon
- Zest of ½ orange (for a citrus twist)
Substitutions & Notes
- Swap almonds with cashews, walnuts, or pecans
- Use sunflower seed butter for a nut-free version
- Medjool dates are ideal, but you can use Deglet Noor—just soak them in warm water for 10 minutes to soften
- Maple syrup keeps it vegan; honey adds floral sweetness
Equipment Needed
- Food processor (a blender can be used, but a food processor is ideal for sticky mixtures)
- Measuring cups and spoons
- Mixing bowl (for final shaping)
- Airtight container for storage
- Parchment paper (optional for lining storage container)
Step-by-Step Instructions

1. Soften the Dates (if needed)
Start by checking the texture of your dates. Medjool dates are usually soft and sticky—perfect for binding ingredients together. But if your dates feel dry or hard, soak them in warm water for about 10 minutes. Deplete completely after splashing and pat dry with paper towel. Soft dates blend better and create a smoother, stickier base for your Nut Energy Balls.
Tip: If your dates are already soft, you can skip the soaking.
2. Grind the Almonds and Oats Together
Place 1 cup of raw almonds and ½ cup of rolled oats into your food processor. Use the pulse function, and blend in short bursts about 6 to 8 pulses until you have a coarse, flour-like mixture. There should still be small pieces of almond visible. You don’t want it too fine; a bit of texture adds a nice crunch to the final product.
Important: Don’t run the machine continuously or you’ll end up with almond butter instead of a crumbly base.
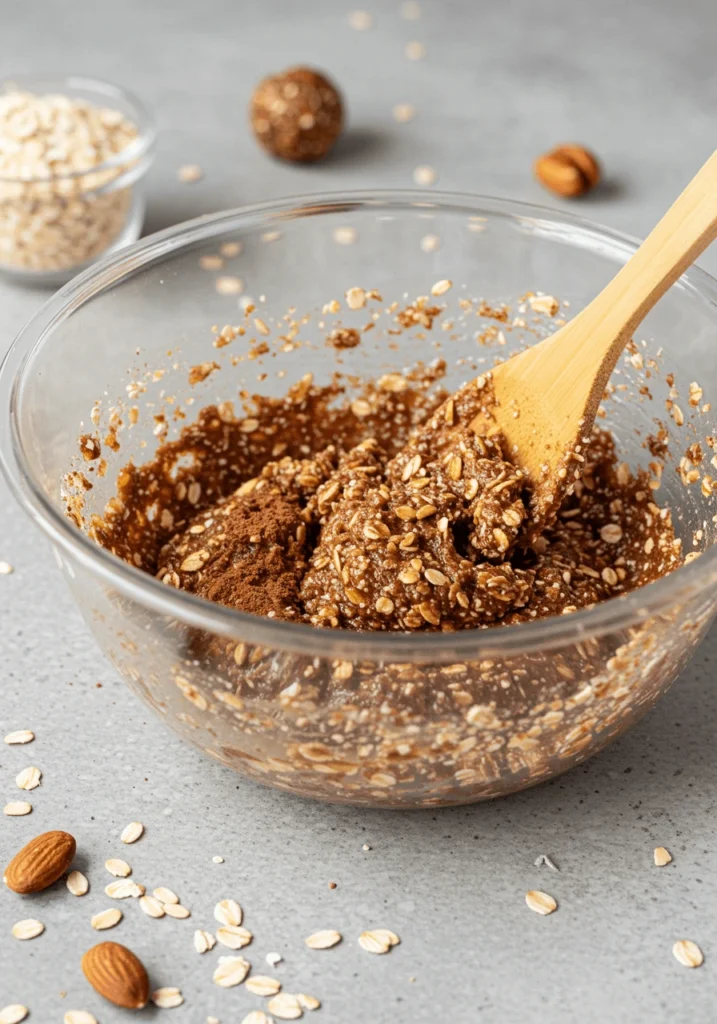
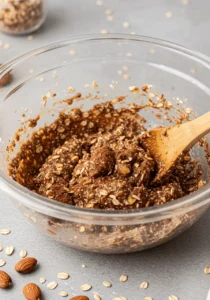
3. Add the Sticky Ingredients and Flavor Boosters
Now add your pitted dates, nut butter, honey or maple syrup, chia seeds, vanilla extract, and a pinch of salt into the food processor. Blend the mixture for about 30–45 seconds, stopping once or twice to scrape down the sides of the bowl. Keep processing until the ingredients start to clump together and form a dough-like consistency.
You’ll know it’s ready when you pinch some of the mixture and it holds its shape without crumbling.
4. Adjust the Texture (If Necessary)
Check your mixture. If it feels too dry and crumbly, add a small spoonful of nut butter or a few drops of water and blend again. If the mixture is too sticky and hard to roll, sprinkle in a tablespoon of oats or ground almonds and pulse again.
Texture is key: aim for a slightly sticky mixture that you can easily shape into balls without it sticking to your fingers too much.
5. Add Your Favorite Flavor Variations (Optional)
At this point, you can customize the flavor based on what you like or what’s in your pantry. Try mixing in:
- Cocoa powder for a chocolate taste
- Shredded coconut for a tropical touch
- Flaxseed meal for added fiber
- Cinnamon or nutmeg for warm spice
- Orange or lemon zest for brightness
Pulse the food processor a few times just to combine the new ingredients without over-blending the mixture.
Don’t add too many dry ingredients all at once add gradually and blend until evenly incorporated.
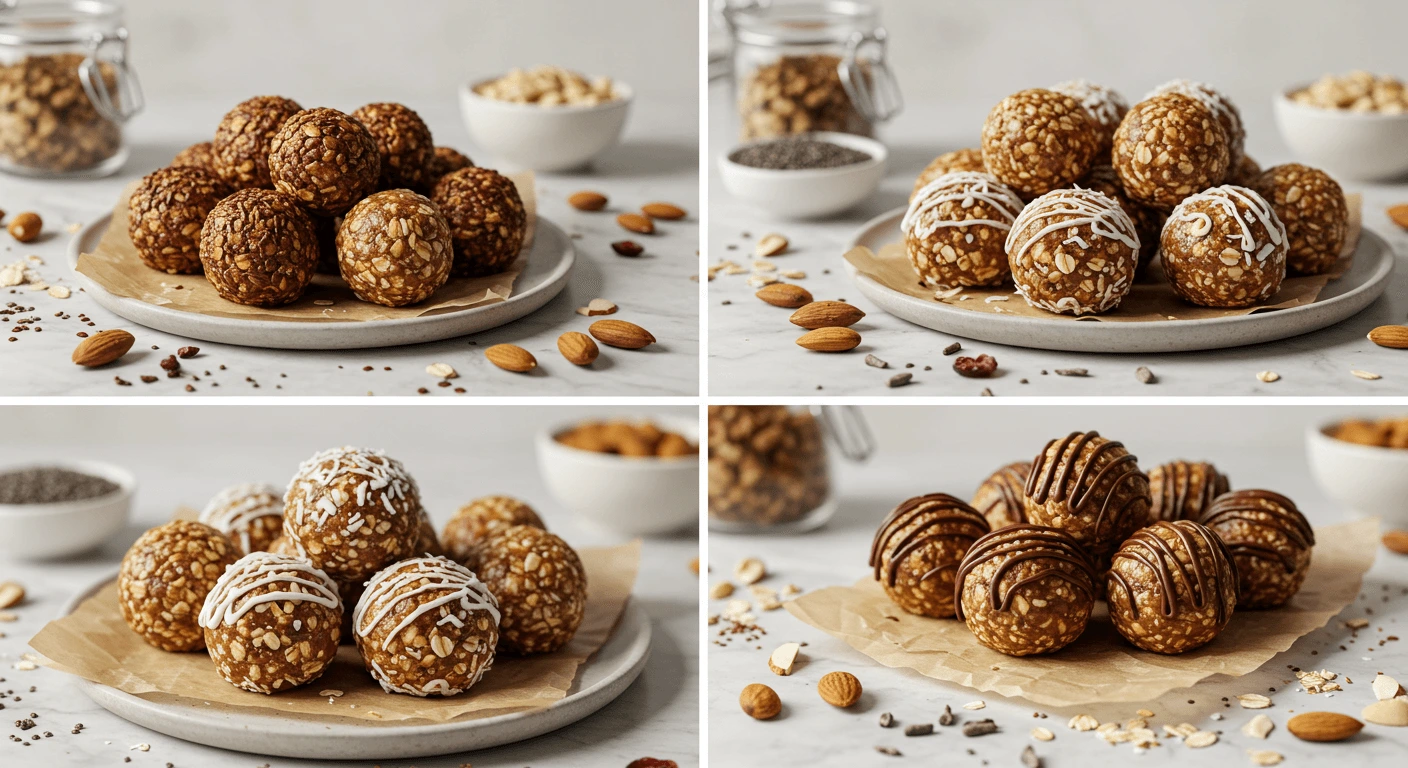
6. Shape the Energy Balls
Scoop out a tablespoon of the dough and roll it between your palms into a smooth ball. If the dough sticks to your hands, dampen your palms with a little water it makes the rolling process much easier and cleaner.
Continue rolling until you’ve used up all the mixture. You should end up with about 18–20 energy balls, depending on the size.
Keep the size uniform so they store evenly and look good when served.
7. Let Them Chill and Set
Transfer the energy balls to a plate or storage container. If you’re layering them, separate each layer with parchment paper to prevent sticking. Chill the container in the fridge for at least 30 minutes.. This helps the balls firm up and improves their texture.
Once chilled, they’ll be easier to pack, carry, or enjoy as a grab-and-go snack.
Nutrition Information (Per Ball)
- Calories: ~110
- Protein: 3g
- Carbohydrates: 12g
- Fat: 6g
- Fiber: 2g
- Sugar: 7g
- Allergens: Contains nuts (almonds, peanut butter), and may contain gluten unless using certified gluten-free oats
Recipe Tips and Variations
Avoid Over-Processing
You want texture in your Nut Energy Balls. Over-mixing turns the nuts into butter and makes the dough too oily. Pulse, don’t blend continuously.
Fixing Texture
If the mixture is too dry, add a teaspoon of water or extra nut butter. If too wet, pulse in a few more oats or nuts.
Flavor Twists
Try dried cranberries and orange zest for a holiday version, or add cocoa powder and espresso for a mocha-inspired batch.
Make-Ahead and Storage
These will keep in the fridge for 2 weeks in an airtight container. 6 .To keep them longer, freeze them up to 3 months. Let thaw for 5 minutes before eating.
Serving Suggestions
Nut Energy Balls pair beautifully with:
- A cup of green tea or coffee
- A post-workout protein shake
- Crumbled into a smoothie bowl
- Packed in school or office lunches
They’re ideal for meal prep. Make a double batch and freeze half to always have healthy snacks ready to go.
Frequently Asked Questions
Q: Can I make these without a nourishment processor?
A: It’s possible but harder. Chop the nuts very finely, mash the dates with a fork, and combine by hand. Texture may be less smooth.
Q: Are Nut Energy Balls kid-friendly?
A: Absolutely. Omit small choking hazards like chocolate chips for younger kids, and go easy on spices.
Q: Can I reduce the sugar?
A: Yes, use fewer dates or omit the honey/syrup. However, sweetness helps hold everything together.
Q: How many can I eat in one sitting?
A: It depends on your energy needs. Two to three balls are usually enough for a snack or pre-workout fuel.
Conclusion
Nut Energy Balls are one of the easiest, healthiest snacks you can make at home. With just a handful of ingredients and 15 minutes of prep, you’ll have a delicious, nutrient-packed snack that works for any lifestyle. Their flexibility means you can adjust the flavor, sweetness, and texture to suit your personal taste whether you’re craving something chocolatey, fruity, nutty, or spicy.
Instead of reaching for packaged snacks with questionable ingredients, you can make your own nutritious option that’s just as satisfying and far more beneficial. Keep a batch in your fridge or freezer and you’ll always have a healthy energy boost within arm’s reach.
Try them once, and they might just become your go-to snack too.
Nut Energy Balls
Ingredients
- 1 cup raw almonds or any nut of choice
- ½ cup rolled oats gluten-free if needed
- 1¼ cup soft Medjool dates pitted
- 2 tablespoons natural almond butter or peanut butter
- 1 tablespoon chia seeds optional, for fiber and texture
- 1 tablespoon honey or maple syrup adjust for desired sweetness
- 1 teaspoon vanilla extract
- Pinch of sea salt
- Optional Mix-ins choose as preferred:
- 1 tablespoon cocoa powder
- ¼ cup shredded coconut
- 1 tablespoon ground flaxseed
- ½ teaspoon cinnamon
- 1 teaspoon citrus zest lemon or orange
Instructions
- Soften the Dates: If your dates are dry, soak them in warm water for 10 minutes, then drain and pat dry.
- Grind Base: Add almonds and oats to a food processor. Pulse until coarsely ground into a rough flour-like texture.
- Blend Ingredients: Add dates, nut butter, honey/maple syrup, chia seeds, vanilla, and salt. Process until mixture forms a sticky dough.
- Adjust Texture: If dry, add a little more nut butter or water. If too sticky, add oats or ground almonds gradually.
- Add Variations (Optional): Blend in cocoa powder, coconut, flaxseed, cinnamon, or zest for custom flavors.
- Shape Balls: Scoop out 1 tablespoon of dough and roll into balls with damp hands.
- Chill to Set: Place the energy balls in the fridge for at least 30 minutes to firm up.
- Store: Keep in an airtight container in the fridge for up to 2 weeks, or freeze for longer shelf life.
Notes
- Use fresh, soft Medjool dates for best results. If dates are too dry, soak them briefly in warm water and drain before use. This ensures the mixture binds well without crumbling.
- Don’t over-blend the nuts. Pulse them just enough to get a coarse texture. If over-processed, they can turn into nut butter, making the dough too oily and soft to roll.
- Add liquid gradually. If the mixture seems too dry, add a teaspoon of water or nut butter at a time. It’s easier to fix dry dough than to rescue one that’s too sticky.
- Chill before shaping if the mixture is too sticky. A quick 10–15 minutes in the fridge will firm up the dough, making it easier to roll into balls.
- Use gloves or lightly damp hands when rolling the balls to prevent sticking and keep them neat.
- Customize the flavor to suit your taste. For example, cocoa powder gives a chocolatey twist, cinnamon adds warmth, and citrus zest provides a bright flavor contrast.
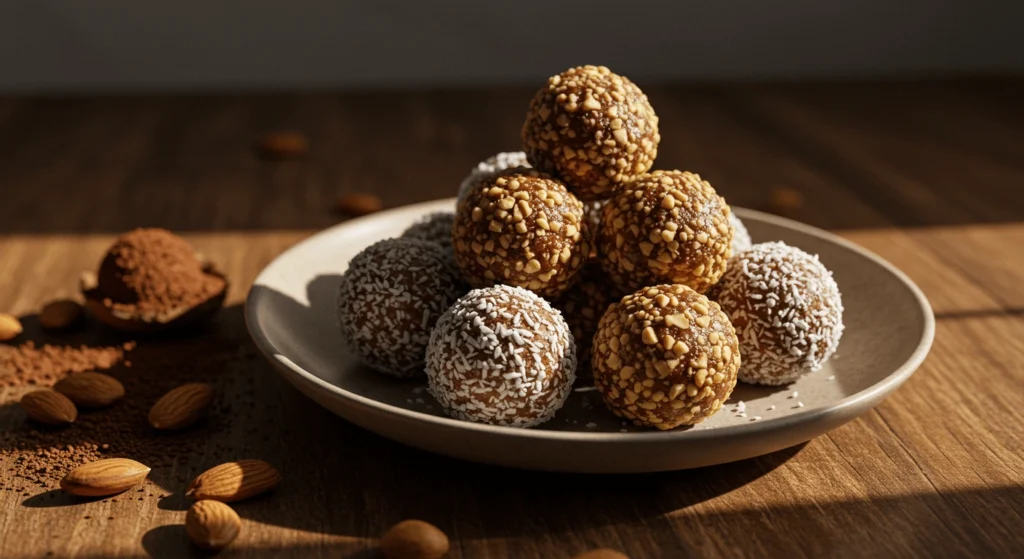
- For added crunch, roll the finished balls in chopped nuts, chia seeds, shredded coconut, or crushed oats.
- Make them high-protein by adding a scoop of protein powder or ground flaxseed. Adjust liquid content to balance the texture.
- Storage tip: These energy balls keep best when stored in an airtight container in the fridge. They will stay fresh for up to two weeks. For long-term storage, freeze in layers with parchment paper between them.
- Ideal for batch prep. Double the recipe and freeze half for later to save time on busy days.
- Make nut-free versions using sunflower seeds or pumpkin seeds in place of almonds and a seed butter instead of almond or peanut butter.
2 Comments
Comments are closed.