
Introduction
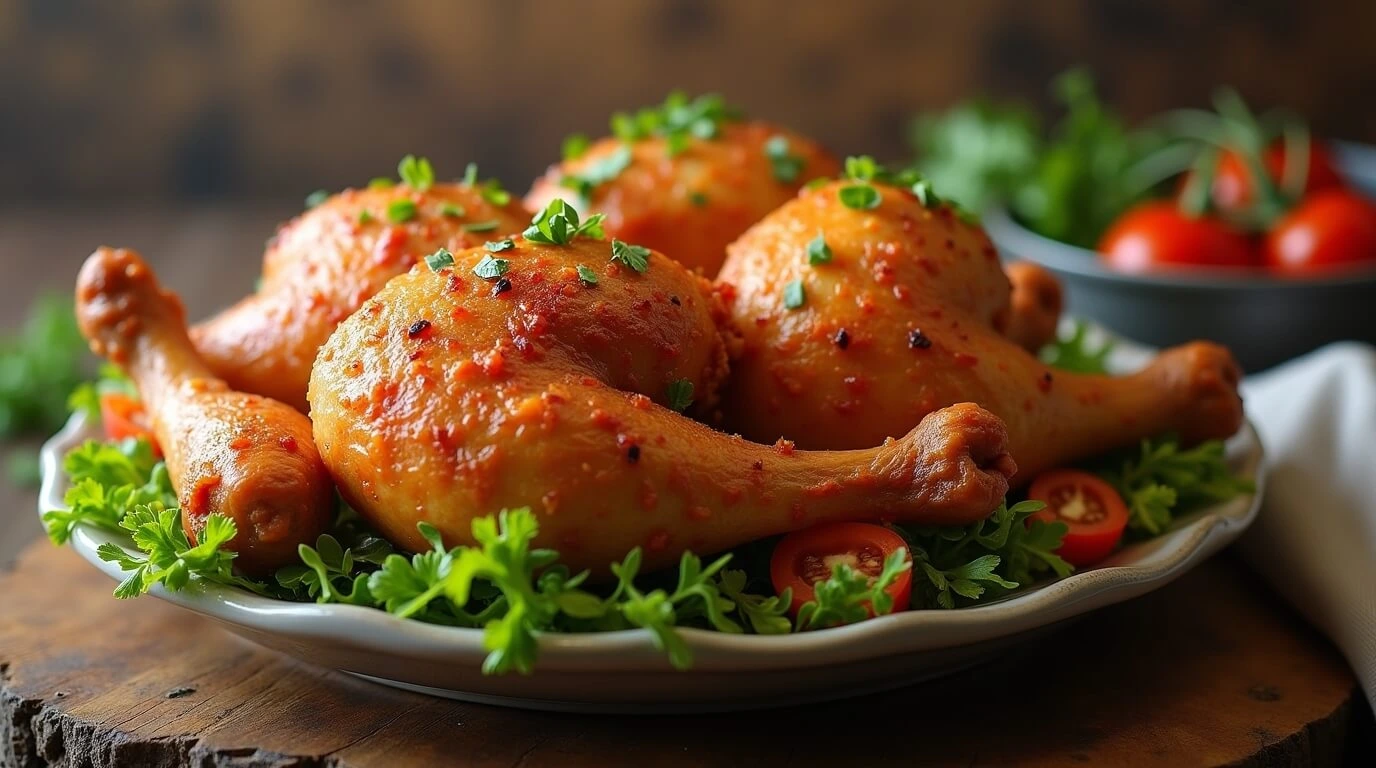
There’s something special about Sunday evenings in my kitchen the scent of garlic and herbs fills the air as I prepare one of my favorite chicken recipes. It’s a simple go-to method that’s saved more dinners than I can count. Gone are the days of dry, tasteless chicken that needs to be smothered in sauce just to be enjoyable.
What makes this recipe truly stand out among other chicken recipes is its reliability. Every time, it delivers juicy, flavorful chicken thanks to three key steps: proper seasoning, careful temperature control, and perfect timing. With just everyday ingredients, you can create chicken breasts that taste like they came straight from a professional kitchen.
It’s quick, healthy, and affordableideal for busy weeknights or meal prep. The result? Golden-brown, tender chicken that’s full of flavor and guaranteed to be the highlight of any meal.
Key Benefits
Time-Saving Convenience Ready in just 25 minutes from start to finish, this chicken recipe fits perfectly into hectic schedules. The hands-on cooking time is minimal, allowing you to prepare sides while the chicken cooks.
Versatile Protein Base These seasoned chicken breasts work with countless flavor profiles. Use them in salads, pasta dishes, sandwiches, or serve alongside any vegetable. The neutral yet flavorful base adapts to Italian, Mexican, Asian, or Mediterranean cuisines.
Wholesome Powerhouse Chicken breast gives incline protein fundamental for muscle upkeep and satiety. Each serving contains approximately 25 grams of protein with minimal saturated fat. It’s naturally gluten-free and keto-friendly.
Budget-Friendly Option Chicken breasts offer excellent value compared to other proteins. This recipe stretches your grocery budget while delivering satisfying, restaurant-quality results at home.
Meal Prep Champion Cook multiple breasts at once for the week ahead. They store beautifully in the refrigerator and reheat without losing moisture or flavor.
Recipe Card/Summary Box
Prep Time: 10 minutes
Cook Time: 15 minutes
Total Time: 25 minutes
Servings: 4 chicken breasts
Difficulty Level: Beginner
Estimated Cost: $8-12 per batch
Ingredient List

For the Chicken:
- 4 boneless, skinless chicken breasts (6-8 oz each)
- 2 tablespoons olive oil
- 1 teaspoon salt
- 1/2 teaspoon black pepper
- 1 teaspoon garlic powder
- 1 teaspoon paprika
- 1/2 teaspoon dried thyme
- 1/2 teaspoon dried rosemary
For Enhanced Flavor (Optional):
- 2 cloves fresh garlic, minced
- 1 tablespoon fresh lemon juice
- 1 tablespoon butter
Substitution Options:
- Oil alternatives: Avocado oil, coconut oil, or cooking spray
- Herb substitutions: Italian seasoning, oregano, or sage
- Salt-free option: Use garlic powder and herbs only
- Dairy-free: Skip butter or use plant-based alternative
Special Ingredients: All ingredients are commonly available at any grocery store. Look for paprika in the spice aisle – sweet paprika works best for this recipe.
Equipment Needed
Essential Tools for the Best Chicken Recipes
To get the most out of your chicken recipes, having the right tools makes all the difference. Here are a few kitchen essentials that help ensure perfectly cooked, flavorful chicken every time:
- Large oven-safe skillet or cast iron pan – ideal for searing and finishing in the oven without switching pans.
- Digital meat thermometer – a must for ensuring your chicken is cooked through without overdoing it.
- Tongs – for easy, clean flipping without piercing the meat and losing juices.
- Small mixing bowl – handy for combining your seasonings and spices in one place.
Smart Alternatives if You’re Missing Tools
Don’t have everything listed above? No worries. Great chicken recipes are still within reach:
- No oven-safe skillet? Simply sear your chicken in a regular pan, then transfer it to a baking dish to finish in the oven.
- No meat thermometer? Pierce the thickest part of the chicken if the juices run clear and there’s no pink, it’s ready.
- No cast iron? A heavy-bottomed stainless steel pan will still give you a beautiful sear and even cooking.
With a few basic tools or clever substitutions you’ll be well-equipped to create mouthwatering chicken recipes right in your own kitchen.
Step-by-Step Instructions
1. Prepare the Chicken (5 minutes)
Start by removing the chicken breasts from the refrigerator about 15 minutes before you plan to cook. Allowing them to sit at room temperature helps them cook more evenly. Next, use paper towels to pat each piece completely dry. This is a crucial step moisture on the surface will cause the chicken to steam instead of sear, which prevents that delicious golden crust from forming.
2. Create the Seasoning Mix (2 minutes)
In a small bowl, combine your spices: salt, black pepper, garlic powder, paprika, thyme, and rosemary. Mix everything thoroughly to ensure even distribution. This simple yet flavorful blend is what sets this dish apart from bland, basic chicken recipes each ingredient adds depth without overwhelming the natural flavor of the chicken.
3. Season the Chicken (3 minutes)
Drizzle olive oil over both sides of each chicken breast. This helps the seasoning stick and aids in browning during cooking. Rub the seasoning mix all over the surface of the chicken, pressing it in gently with your hands. This not only enhances flavor but also builds a flavorful crust. Once seasoned, let the chicken rest for about 5 minutes while your pan preheats this allows the spices to settle in and improves the final texture.
4. Heat the Pan (2 minutes)
Preheat your oven to 375°F (190°C). Meanwhile, place your skillet or cast iron pan over medium-high heat. Let it heat until it’s hot but not smoking this usually takes about two minutes. You’ll know it’s ready when a tiny drop of water instantly sizzles and evaporates upon contact with the pan. This heat level is perfect for searing.
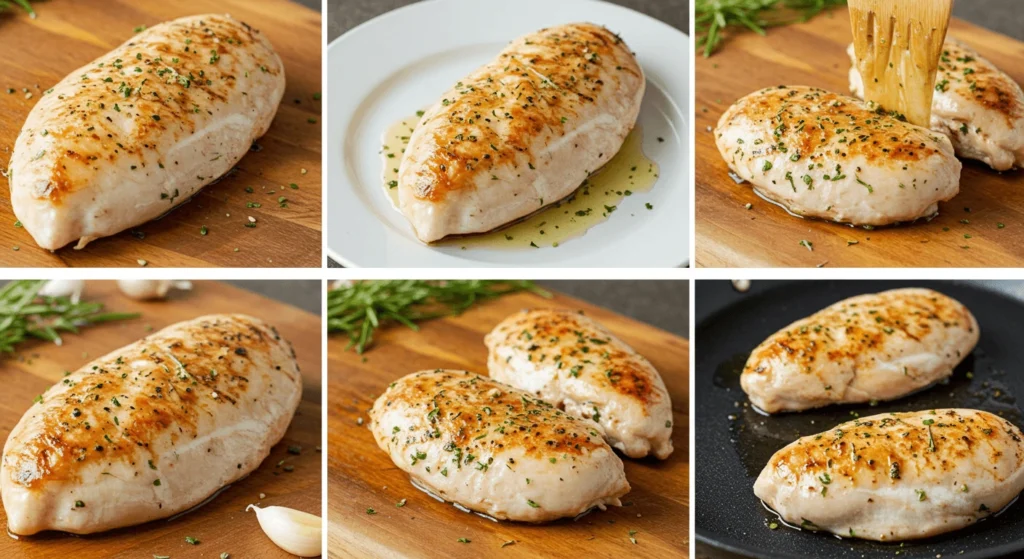
5. Sear the First Side (4 minutes)
Carefully lay the seasoned chicken breasts into the hot skillet. You should hear an immediate sizzle that sound tells you the pan is hot enough to begin caramelizing the surface and creating a golden crust. Resist the urge to move the chicken. Let it cook undisturbed for four full minutes to build that beautiful, flavorful sear.
6. Flip and Burn the Other Side (3 minutes)
After the first side is nicely golden, use your tongs to flip each chicken breast. The surface should have a rich, brown color. Let the moment side burn for approximately three minutes to get a comparable brilliant finish. At this point, the chicken is not fully cooked yet, but it’s ready to go into the oven for even cooking.
7. Finish in the Oven (8–12 minutes)
Once both sides are seared, transfer the entire skillet to your preheated oven. Bake the chicken until it reaches an internal temperature of 165°F (74°C) when measured with a meat thermometer at the thickest point. The time will vary based on the size of your chicken breasts: thinner pieces may only need 8 minutes, while thicker ones could take up to 12.
8. Rest and Serve (5 minutes)
Remove the skillet from the stove and let the chicken rest right in the container for 5 minutes. This step is easy to skip, but don’t it allows the juices to redistribute throughout the meat, keeping the chicken moist and tender. For an extra touch of flavor, you can add a pat of butter and a few crushed garlic cloves to the pan while the chicken rests. This infuses a rich, aromatic finish that elevates the dish beyond your average chicken recipes.
Critical Timing Tips:
- Don’t flip too early – patience creates better browning
- Use a timer for oven cooking to prevent overcooking
- Internal temperature is more reliable than cooking time alone
Nutrition Information
Per Serving (1 chicken breast):
- Calories: 185
- Protein: 25g
- Fat: 8g
- Carbohydrates: 1g
- Fiber: 0g
- Sodium: 590mg
Macronutrient Breakdown:
- 54% Protein
- 39% Fat
- 7% Carbohydrates
Allergen Information: This recipe is naturally free from gluten, dairy (without butter), nuts, and soy. Contains no common allergens in the base recipe.
Recipe Tips and Variations
Avoiding Common Botches: Never skip the resting period after cooking. Cutting quickly causes juices to run out, making dry chicken. Always use a meat thermometer rather than guessing doneness by appearance alone.
Don’t overcrowd the pan if making multiple batches. This lowers the temperature and prevents proper searing. Cook in batches if necessary to maintain heat.
Make-Ahead Informational: Season chicken breasts up to 24 hours in advance. Store covered in the refrigerator for deeper flavor penetration. You can also cook completely and store for meal prep purposes.
Storage and Warming: Cooked chicken breasts keep in the fridge for 4 days. Store in airtight containers to maintain moisture. Reheat gently in a 325°F oven for 10 minutes, or slice and add to hot dishes.
For freezing, wrap individual breasts in plastic wrap, then place in freezer bags. They’ll keep for 3 months. Thaw overnight in the refrigerator before reheating.
Seasonal Adaptations:
- Summer: Add fresh herbs like basil or cilantro after cooking
- Fall: Use sage and apple cider vinegar for autumn flavors
- Winter: Include warming spices like cumin or smoked paprika
- Spring: Finish with lemon zest and fresh parsley
Flavor Variations:
- Mediterranean: Add oregano, lemon juice, and olives
- Mexican: Use chili powder, cumin, and lime
- Asian-Inspired: Finish with ginger, soy sauce, and sesame oil
- Italian: Include basil, tomatoes, and balsamic vinegar
Serving Suggestions
Complementary Sides: Roasted vegetables pair beautifully with this seasoned chicken. Try Brussels sprouts, asparagus, or sweet potatoes. Rice pilaf or quinoa absorbs the pan juices wonderfully.
Fresh salads provide nice contrast to the warm, savory chicken. A straightforward arugula serving of mixed greens with lemon vinaigrette complements the herbs perfectly.
Beverage Pairings: White wines like Chardonnay or Sauvignon Blanc enhance the chicken’s flavors. For non-alcoholic options, try sparkling water with lemon or unsweetened iced tea.
Plating Recommendations: Slice chicken diagonally to show the juicy interior. Fan slices over grains or greens. Drizzle any pan juices around the plate for extra flavor and visual appeal.
Frequently Asked Questions
Q: How do I know when chicken is fully cooked? A: Use a meat thermometer inserted into the thickest part. It should read exactly 165°F. The juices should run clear, not pink, when the meat is pierced.
Q: Can I use frozen chicken breasts? A: Thaw completely first. Frozen chicken won’t sear properly and cooks unevenly.
Q: What if my chicken breasts are different sizes? A: Pound thicker portions to even thickness, or remove smaller pieces from the oven earlier. Consistent thickness ensures even cooking throughout.
Q: Can I double this recipe? A: Absolutely. Use two skillets or cook in batches. Don’t overcrowd one pan, as this prevents proper browning and may result in steamed rather than seared chicken.
Q: How do I prevent dry chicken? A: Don’t overcook past 165°F, and always let it rest after cooking. The resting period allows juices to redistribute, keeping the meat moist and flavorful.
Q: What herbs work best for chicken? A: Thyme, rosemary, sage, and oregano are classics. Fresh herbs should be added after cooking, while dried herbs can be included in the initial seasoning mix.
Q: Can I make this recipe without oil? A: Use cooking spray or a non-stick pan, though you may sacrifice some browning. The oil helps create the golden crust that adds flavor and texture.
This chicken recipe transforms simple ingredients into a restaurant-quality meal that works for any occasion. Master this basic technique, and you’ll have endless possibilities for creating delicious, healthy dinners your family will request again and again.
Conclusion
Mastering this easy chicken breast recipe opens the door to countless delicious and healthy meals. Whether you’re cooking for a busy weeknight, prepping meals in advance, or hosting a casual dinner, this technique delivers consistent, flavorful results every time. The beauty of this method lies in its simplicity no complicated steps, no fancy tools, just real food and smart cooking.
Among all the chicken recipes out there, this one stands out for being reliable, customizable, and family-approved. With just a few pantry staples and a good skillet, you can turn plain chicken into a juicy, golden masterpiece.
So next time you’re wondering what to make for dinner, skip the takeout and trust this foolproof formula. Once you try it, you’ll never look at chicken breasts the same way again.

Chicken Recipes
Ingredients
- 4 boneless skinless chicken breasts (6-8 oz each)
- 2 tablespoons olive oil
- 1 teaspoon salt
- 1/2 teaspoon black pepper
- 1 teaspoon garlic powder
- 1 teaspoon paprika
- 1/2 teaspoon dried thyme
- 1/2 teaspoon dried rosemary
- Optional for enhanced flavor:
- 2 cloves fresh garlic minced
- 1 tablespoon fresh lemon juice
- 1 tablespoon butter
Instructions
- Prepare the Chicken (5 minutes)
- Remove chicken breasts from the refrigerator 15 minutes before cooking. Pat dry completely with paper towels to ensure proper searing and avoid steaming.
- Create the Seasoning Mix (2 minutes)
- Combine salt, black pepper, garlic powder, paprika, thyme, and rosemary in a small bowl. Mix well for even seasoning distribution.
- Season the Chicken (3 minutes)
- Drizzle olive oil over both sides of each chicken breast. Rub the seasoning mix all over, pressing gently to help it stick. Let rest for 5 minutes while heating the pan.
- Heat the Pan (2 minutes)
- Preheat the oven to 375°F (190°C). Heat a skillet over medium-high heat until hot but not smoking. Test by dropping a drop of water; it should sizzle immediately.
- Sear the First Side (4 minutes)
- Place chicken breasts in the hot skillet. Hear the sizzle? That’s proper browning. Don’t move chicken for 4 minutes to develop a golden crust.
- Flip and Sear (3 minutes)
- Flip chicken with tongs. The first side should be golden brown. Sear the other side for 3 minutes until equally golden.
- Finish in Oven (8-12 minutes)
- Transfer skillet to the preheated oven. Bake until the internal temperature reaches 165°F (74°C). Thin breasts need 8 minutes; thicker ones up to 12 minutes.
- Rest and Serve (5 minutes)
- Remove from oven and let rest in pan for 5 minutes to redistribute juices. Add butter and minced garlic during resting if desired.
Notes
- Bring chicken to room temperature: Removing chicken breasts from the fridge 15 minutes before cooking helps them cook evenly and prevents toughness.
- Pat dry thoroughly: Dry chicken sears better and develops a flavorful crust instead of steaming in the pan.
- Use a meat thermometer: This ensures perfectly cooked chicken every time. Avoid guessing doneness to prevent dryness or undercooking.
- Don’t overcrowd the pan: Cooking chicken breasts in batches if needed maintains high heat for proper browning.
- Rest the chicken: Letting the chicken rest after cooking allows juices to redistribute, keeping the meat juicy and tender.
- Customize the seasoning: Feel free to adjust herbs and spices to suit your taste or to match your favorite cuisine styles.
- Make ahead: You can season chicken breasts up to 24 hours in advance for deeper flavor or cook them fully and store for easy meal prep.
- Reheating tips: Reheat gently in a low oven (about 325°F/165°C) to retain moisture without drying out the chicken.
- Alternative cooking methods: If you don’t have an oven-safe skillet, sear chicken in a pan, then finish baking in a separate dish.
- Add finishing touches: For extra flavor, add a pat of butter or a squeeze of lemon juice just before serving.
Share Your Experience
There are no reviews yet. Be the first one to write one.
4 Comments
Comments are closed.